


|
|||||||||||||||
![]()
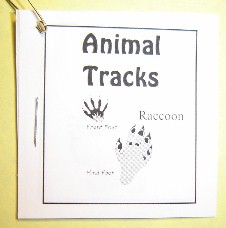 |
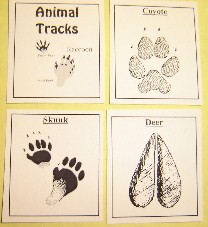
Animal
Tracks:
Animal Tracks Printout
Side One - WP
Print Side One, flip the paper, and print side two on the back. Cut out each square of the tracks. Make sure that you leave a white area around the squares. Do not cut on the solid line. Place in a pile and staple the left edge to create a booklet. |
 |
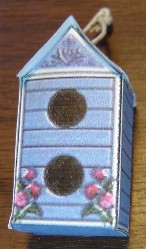 |
Birdhouse:
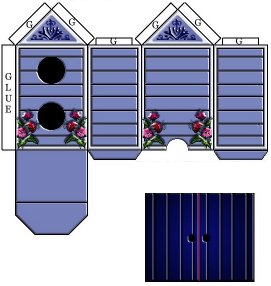
Birdhouse
- WP Supplies: Print and cut out the Birdhouse. To make it easier to glue the house together, cut the tabs longer then what is marked (see the example). After cutting out the roof, use the point of the scissors or wire and poke the holes in the top of the roof where indicated. I find it works better if you actually make the holes lower (farther apart) than what is marked. Fold the sides of the birdhouse, then open it up flat again. Now fold all the tabs. Open up again. Spread glue on the long tab on the side of the house. Fold the house together with the edge of the house even with the folded edge of the tab. Press together. If you put your finger or a wooden stick inside the house and then press it, that will help make the contact better. Fold the roof in half. Cut a piece of wire 2 inches long. Push it thru both holes till it is halfway through then bring the ends up together (forming a loop) and twist them together. Fold the twisted ends down a little so they don’t stick upwards. Fold the house top tabs down at a 90 degree angle and spread glue on all the tabs. Place the roof on top of the tabs. Again, slide your finger or the wood stick up into the house and gently press upwards while at the same time pushing down on the roof to make sure that it is in contact with the glued tabs. Fold the two house bottom tabs inward. Spread glue on them. Spread glue on the floor tab. Fold the floor upward and tuck the floor tab into the bottom of the house. Set the house on the table and gently push downward. This will help make the bottom contact the glued tabs. |
 |
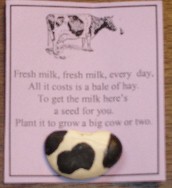 |
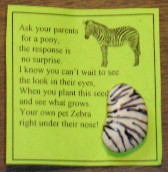
Cow and Zebra
Seeds:
Cow Seeds
- WP Print and cut out the Cow Seed insert and the Zebra Seed insert. Put into zip bag. Using a black marker, on the cow seed, make black patches on both sides of the seed. On the Zebra seed, make stripes on both sides of the seed.
|
 |
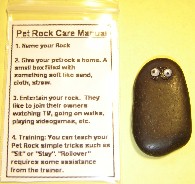 |
Pet Rock:
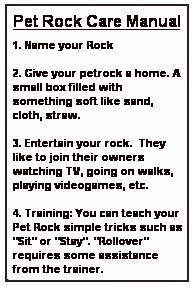
Pet Rock Manual - WP Supplies: Print and cut out the Pet Rock Care Manual Printout. Slide it into the zip bag. Glue two wiggle eyes to the rock. When dry, put it in the bag. |
Pot Dog |
Pot
Animals:
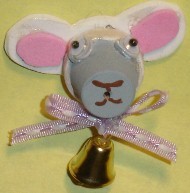
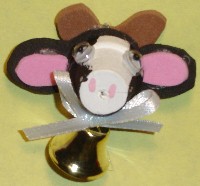
Supplies: The Horse is easy to make. The Dog is harder because of the small facial parts. The basic parts can be modified to make a Sheep, Cow, Cat, or Bear. For
the Dog and Horse: Making
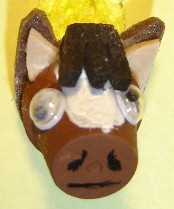
the Pot Horse
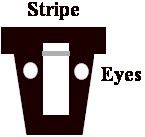
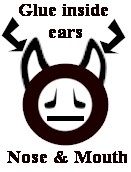
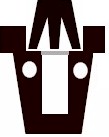
Print the Horse stickers sheet onto Avery 8160 address label sheets (or the equivalent). Cut out one set of horse stickers. Place the head/ears sticker onto the brown foam and cut out the horse head outline. Place the ear insides sticker onto the tan foam and cut out. Place the Mane sticker on black foam and cut out. Peel all the stickers off. Using super glue gel or hot glue, put a ring of glue around the top opening edge of the pot. Put the brown foam piece on the top of the pot making sure that the stripe is lined up BETWEEN the ears (see example). Using super glue or white glue, put a small dot of glue in the middle of the each ear and place the tan inside ear piece into each ear with the bottom of each piece pushed down against the pot (B). Glue two wiggle eyes onto the pot on either side of the white stripe (C). Use super glue or hot glue to put a small line of glue on the top edge of the pot between the ears and put the back end of the mane piece (C). Use a black marker (with a fine point), a black pin, or black paint, to draw on two nostrils and a mouth (B). Glue a pin back to the back. Making
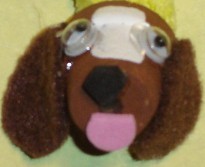
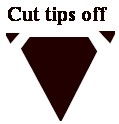
the Pot Dog
For the Dog: Print out the Dog Stickers. Place a set of the dog ear stickers onto the brown felt. Cut out the two ears. Peel off the stickers. Cut a strip of black foam 1/4 inch wide. Cut a triangle from the foam strip (A). The long point of the triangle should face downwards. Cut off the top two tips (B). This makes the dog’s nose. Using a hold punch, punch out a circle of pink foam. Cut the tip off the circle (C). The makes the dog’s tongue. Glue the nose on the front of the pot even with the top edge and glue the tongue on the bottom with it hanging over the edge (D). Glue two eyes to the pot on either side of the white stripe. Glue each ear to both sides of the pot. |
||||||||||||||
Pot Horse |
|||||||||||||||
Pot Sheep |
|||||||||||||||
Pot Cow |
|||||||||||||||
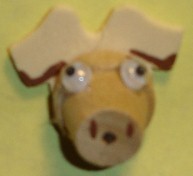
-Pot Pig |
![]()
 |
 |
Webmaster: Debdemer@aol.com
Send mail to debdemer@aol.com with questions or comments about this web site.
Copyright © 2002 All rights reserved.
Last modified: 06/27/2009


