


|
|||||||||||||||
![]()
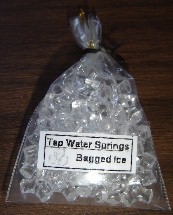 |
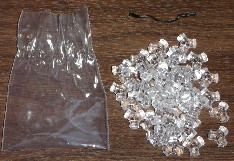
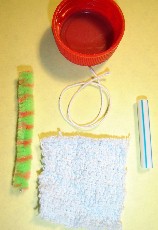
Bag of Ice:
Bag
of Ice Logo - WP Supplies: Printout the Bag of Ice Logo. Place a piece of clear tape over the logo making sure that the tape edges extend past all sides of the logo. Place the logo near the bottom of the bag. Cut off the zip part of the bag. Fill about half way with clear tri-beads. Use a twist tie wire to close the top |
 |
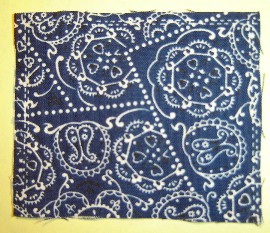 |
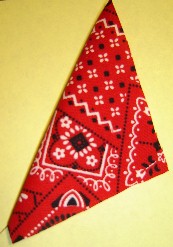
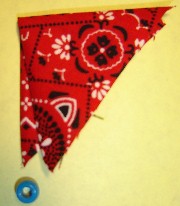
Bandana: Supplies: Cut a square of the bandana fabric. Fold the square in half diagonally forming a triangle. Fold in half again bringing the two folded outer points together forming another triangle. Slide a bead onto the two ends. |
|
 |
 |
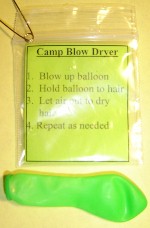 |
Camp Blow Dryer: Camp
Blow Dryer Insert - WP Supplies: Print and cut out the Camp Blow Dryer tag. Place balloon in bag. Staple tag to top. |
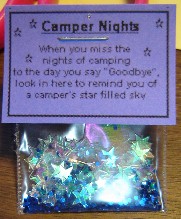 |
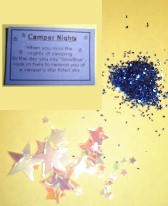
Camper Nights: Supplies: Camper
Nights Top Tag - WP
|
 |
 |
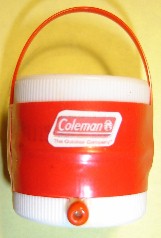 |
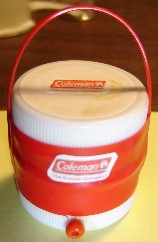
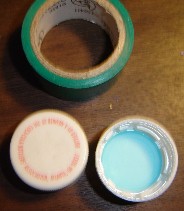
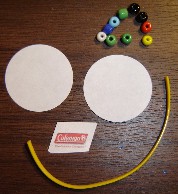
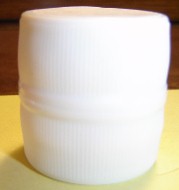
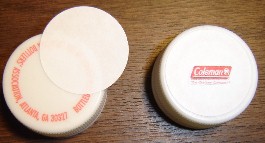
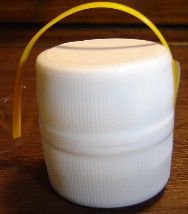
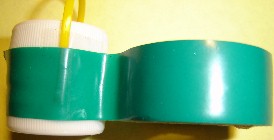
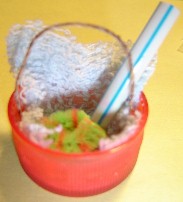
Cooler: Cooler
Logo - WP Supplies:
For best results, make sure that
the 1. Use hot glue to glue together to caps 2. While caps are setting, cut out two of the Coleman Logos 3. Peel off a round sticker and place on the top of the cap to
cover the lettering. Place a round sticker on the bottom cap also. 4. Spread a thin layer of glue on the back of ONE of the logos and place on the top sticker. 5. Cut a piece of plastic lacing 2 inches long.
Using hot glue, glue one end to
one side of the cooler at the seam.
Bend the lace into a handle and glue
the other end to the opposite side. 6. Using the electrical tape, wrap completely around the middle of the cooler. 7. Spread glue on the back of the last Coleman Logo and place in
the middle
of the top half of tape on the front of the cooler. 8. Using hot glue, glue a bead to the front of the cooler down at the bottom edge. This is the “spout” on the cooler |
 |
 |
|
 |
||
 |
||
 |
||
 |
||
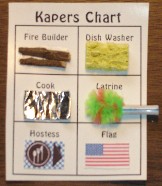 |
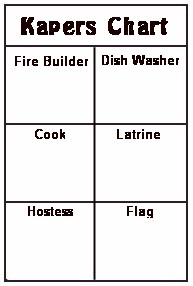
Kapers Chart: Kapers
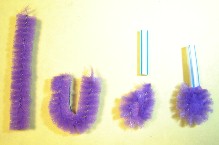
Chart - WP Supplies: Print and cut out the Kapers Chart and Graphics page. Cut two small pieces of twigs (about ½ inch long) and glue to the Kapers Chart under “Fire Builder”. Cut a small piece of tin foil and fold in thirds to form a rectangle, then fold up the two ends. This makes a “Meal in a Bag”. Glue it on the Kapers Chart under “Cook”. Cut out the Hostess printout and glue it on the Chart under “Hostess”. Cut out the Flag and glue on the Chart under “Flag”. Cut a piece of the straw ½ inch long. Cut a piece of Chenille 1 inch long. (See example) Bend it around into a loop and twist the ends together. Put glue (NOT HOT GLUE!) Into the straw and slide the end of the chenille into the glue/straw. Glue the toilet brush on the Chart under “Latrine”. Cut a strip from the sponge (A) 1/4 inch wide (B). Turn it on it’s side (C) and cut into rectangles about ½ inch long. Glue the sponge piece on the Chart under “Dish Washing” |
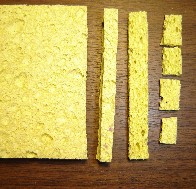 A B C D |
|
 |
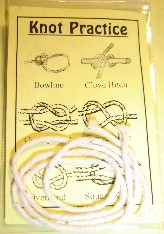 |
Knots Practice: Knots
Practice Side 1 - WP Supplies:
|
 |
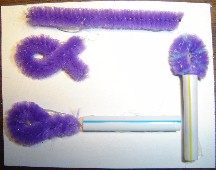
Latrine Duty: Supplies: Cut a piece of the terry cloth 1 ½ “ x 1 ½" square. Cut a piece of wire 5 inches long. Twist the two ends together. Bend the bottom of the wire to fit into the bottom of the cap. Test and adjust the wire until it fits in the cap bottom and next to the sides. Once it fits okay, use hot glue to fasten the wire into the bottom of the “bucket” Use hot glue or white glue to glue the terry cloth into the bucket. Cloth should cover the bottom of the bucket and up one side. Make sure that the side is glued also. Cut a piece of the straw 1 1/4 inches long. Cut a piece of chenille 2 inches long. Bend the chenille around into a loop and twist the ends together. Bend the stem upward at a slight angle. Put a squirt of white glue (DO NOT USE HOT GLUE!) into one end of the straw. Push the twisted end of the chenille into the glued end of the straw. Use hot glue or white glue on the bottom of the “toilet brush” and put in the bottom of the bucket on top of the cloth. Push down with your finger or a wood stick on top of the fuzzy part of the brush to make sure it is glued down well |
 |
|
 |
|
 |
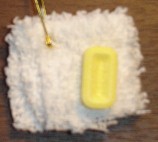 |
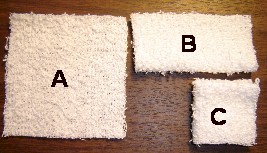
Soap and Wash Rag: Supplies: Cut the terry cloth into 3 inch by 3 inch squares (A). Fold the square in half (B). Fold that into half again (C). Pin the top two folded corners together (this will keep the wash rag closed. Using hot glue, glue one piece of the Pez candy in the middle of the folded wash rag. DO NOT USE WHITE GLUE! This will “melt” the candy since the white glue is water based. |
 |
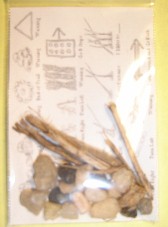 |
Trailsigns: Trailsigns
Printout - WP Supplies: Print and cut out the trailsigns insert. Cut 5 pieces of twigs about 2 inches long. Put those into the bag along with about 10 pieces of gravel. |
![]()
 |
 |
Webmaster: Debdemer@aol.com
Send mail to debdemer@aol.com with questions or comments about this web site.
Copyright © 2002 All rights reserved.
Last modified: 03/22/2009