


|
|||||||||||||||
![]()
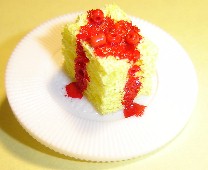 |
Cherry Cheesecake: Supplies: On the sponge, measure a strip ½ inch wide on the sponge and cut it off. Cut the strip into ½" wide cubes. Use hot glue or super glue to glue the sponge piece to a poker chip (or foam circle). Using the Red Glass Stain, put a couple of drops on the top of the sponge. Use the tip of the paint to paint a line down the sides of the sponge leaving a small spot on the “plate”. This is to make it look like cherry sauce has dribbled down the side of the cheesecake to the plate. Sprinkle 3-5 glass beads on the top of the sponge. Place another drop of glass stain on top of the beads . When the paint dries, it will “glue” the beads to the sponge. After everything is dry, glue a pin back to the back of the “plate”. |
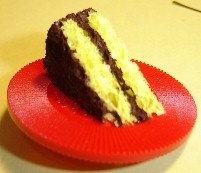 |
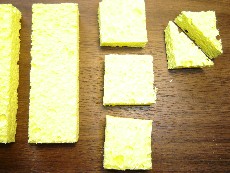
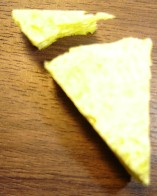
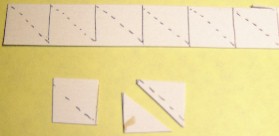
Chocolate Cake: Supplies: Cut a strip of the sponge 1 inch wide. Cut the strip into approx 1 inch squares. Cut the square diagonally into two triangles. Cut the short side of the triangle in a slight curve to round off the end (see examples). Flip the triangle up it is resting on the narrow, long side. Glue the “cake” to the middle of the poker chip “plate”. It’s best if white glue is used and it dries overnight, however for quick results, use hot glue. Do not use super glue gel. When the cake is dry, paint it using the dark brown paint. It’s best to use a bottle with the narrow painting tip on it, but a slim brush can also be used. Paint one side of the cake with the “frosting” paint and paint the curve side. Then carefully paint a strip down the middle of the top wedge. Glue a pin back to the back of the plate. |
 |
|
 |
 |
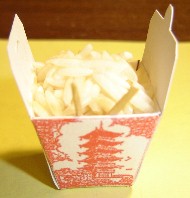
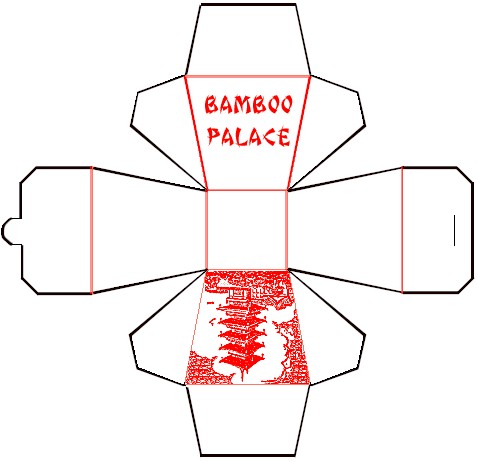
Chinese Takeout Box: Chinese
Takeout Box Printout - WP Chinese
Takeout Box Instructions with Diagrams - WP Supplies: Instead putting the instructions and diagrams on the website, I have provided document downloads. The instructions comes complete with many diagrams to help put the box together. Also includes instructions for the rice bowl. |
 |
|
 |
 |
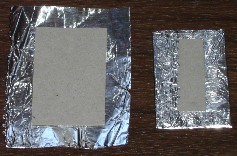
Cookie Sheet: Supplies: Cut the cardboard into rectangles 1 ½ inches long and 1 inch wide to make the cookie sheet. Cut a piece of tin foil larger than the “sheet” (approx 2 inches x 1 3/4 inches). Place the sheet in the middle of the tin foil. Fold the around the sheet to the back of the sheet. Fold flat and use a piece of tape to down the tin foil. A single piece of tape will cover the back of the sheet. When folding the edges of the tin foil, make sure that the edges do not go all the way across and meet each other. You need to be able to see the back of the cardboard so that the tape can fasten the tin foil edges AND tape to the cardboard. Turn the sheet over. Carefully bend upwards the top 1/4 inch of the cookie sheet. Using a hole punch, punch out 6 “cookies” from the tan foam. Using the black pin, make random dots on the cookies to make them look like chocolate chips. Using white glue or super glue gel, make 6 dots of glue on the cookie sheet and place the cookies on the sheet. |
 |
|
 |
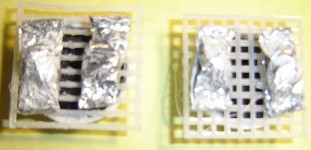 |
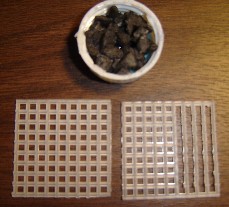
Mini Grill: Supplies: Using the cap, scoop up ½ a capful of charcoal. Pour into a paper cup. Pour a small amount of white glue on the charcoal. Use a wood stick to stir the charcoal until all pieces are covered with glue. Scoop the charcoal into the cap “grill”. Make sure that the charcoal does not stick above the top of the cap. Cut the plastic canvas 9 squares by 9 squares. Option 1: Use the grill top as is. Option 2: Carefully snip away the rows of connections leaving just the bars. (See diagram) This makes a more realistic looking grill. Hot glue the grill to the top of the cap. Cut two pieces of tin foil. Place one or two small pieces of charcoal in the center of the tin foil and fold the tin foil around it in a rectangular shape to make a “foil dinner” pack. Make two of these. Hot glue these to the grill. Glue a pin back to the bottom of the cap. |
 |
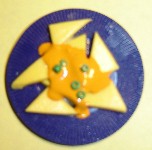 |
Nachos: Supplies: Poker ChipsCut a strip of yellow foam ½" wide. Cut triangles from the strip by holding the scissors at a 45 degree angle to the strip. Cut, then cut straight across. Continue alternating the cuts to create a pile of triangles. You will need about 5-7 “nachos” per plate. Put your nachos into a cup or on a paper plate so you can mix glue into them. Using Elmers glue, (NOT THE BLUE GLUE), mix several drops of glue into the nachos. Use a wood stick to stir them until they are completely covered with glue. Using the stick, drop the nachos down onto the middle of a poker chip. Use the stick to move the nachos around to look like a pile of chips. Use the Orange paint and squeeze a blob of paint in the middle of the pile of nachos. Do not try to cover all of the nachos. Sprinkle about 5-7 green beads onto the orange paint to represent jalapenos. Option: Sprinkle a few black beads to represent olives. After nachos are dry, glue pin back to back of poker chip. |
 |
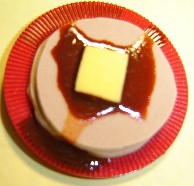 |
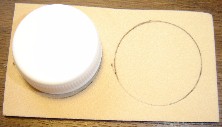
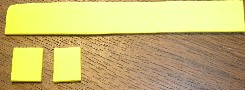
Pancakes: Supplies: Use a bottle cap as a template. Place on the tan foam sheet and draw around the cap. Do this twice. Cut out the two round “pancakes”. Glue (white glue, hot glue, or super glue) one pancake to the poker chip and then glue the other pancake on top of the first pancake. Cut a ½ inch wide strip from the yellow foam. Then cut ½ inch wide squares from the strip. This is the “butter”. Glue the butter to the top of the pancake. Drizzle the Brown Glass Stain paint over the pancakes and let some drizzle down the side to the plate. When everything is dry (overnight), glue a pin back to the back of the “plate”. |
 |
|
 |
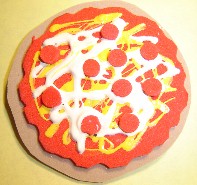 |
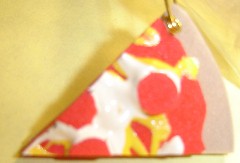
Pizza and Pizza Slices: Supplies: Cut a 2 ½ inch diameter circle out of the tan foam. Cut a 2 ½ inch circle out of the red foam. Using the scissors, re-cut around the edge of the red foam circle and cut out scoops and ridges. Using a hole punch, punch out dots of red foam. These make the “pepperoni” for the pizza. Using white glue, glue the red circle to the tan circle. Use the Yellow Slick paint and drizzle it on the red foam in a zig ziggy pattern. Do not completely cover it, you want to see some of the red thru the yellow. Use the white slick paint over the yellow (recommend going in a different directions). While the paint is still wet, place the “pepperoni” on the pizza. After the pizza is completely dried overnight, cut it into pizza slices. If you want to make a whole pizza as a Swap, make the pizza smaller by cutting 1 3/4 inch diameter circles. |
 |
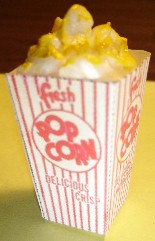 |
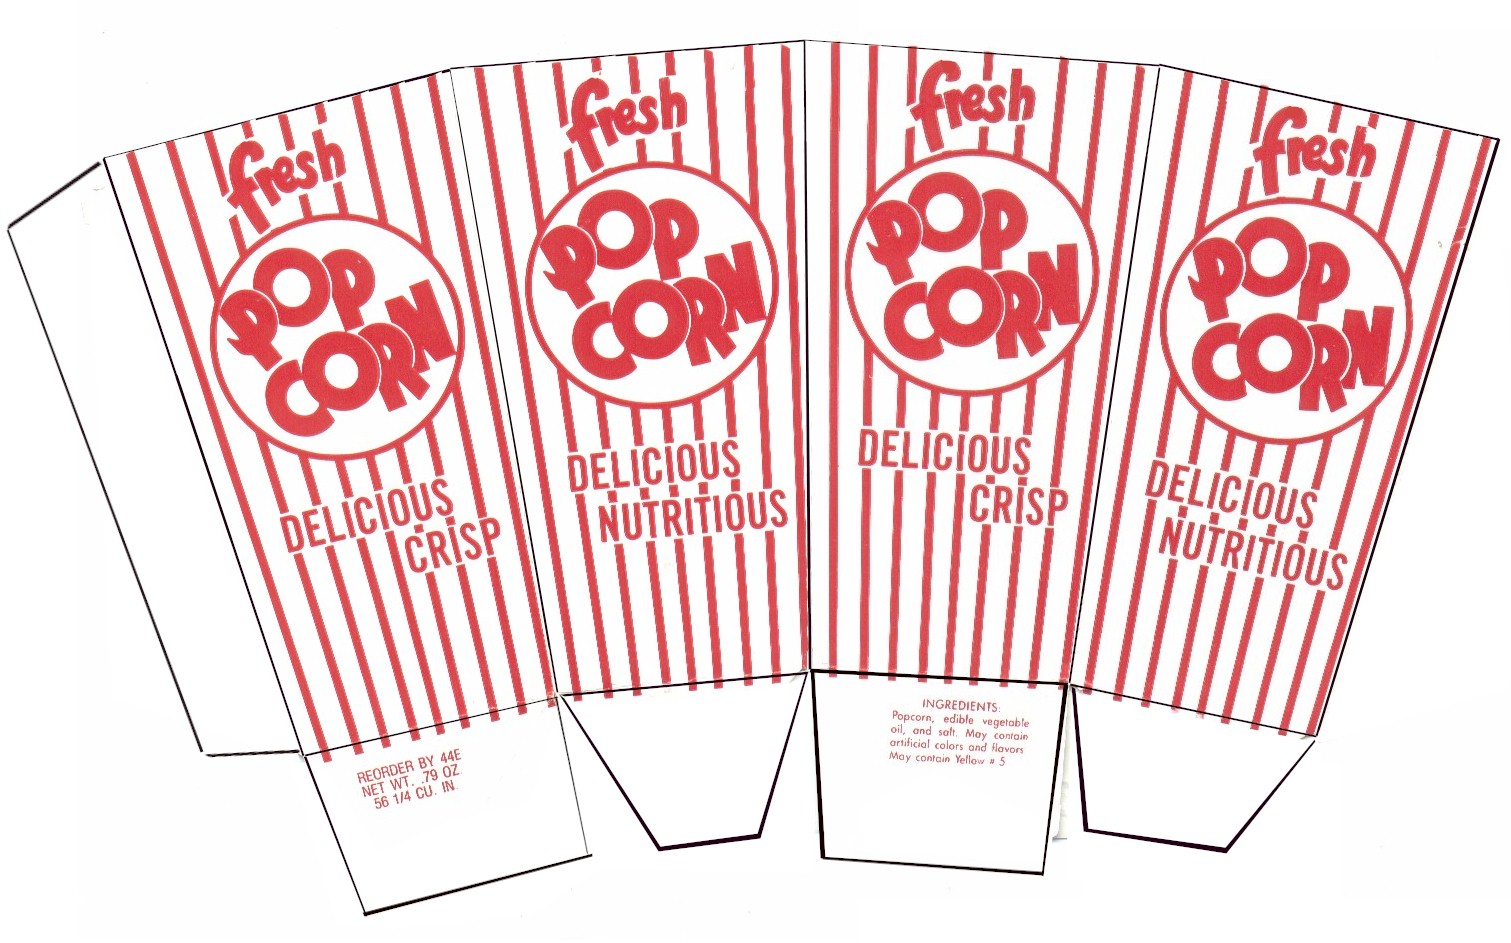
Popcorn Box: Popcorn
Box Printout - WP Supplies: The instructions and diagrams for making the Popcorn Box are in the downloadable documents above. The diagrams give complete, step-by-step instructions. |
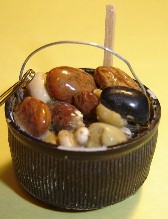 |
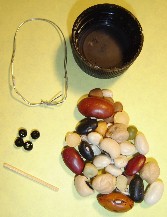
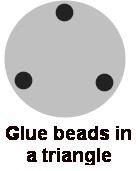
Dutch Oven Stew: Supplies: If you don’t have black caps, then use black spray paint to paint some (inside and out). Caps will need to be dry before you use them. Turn the cap over and on the bottom, glue (hot glue or super glue) 3 black beads along the edge (making a triangle) Cut a piece of wire 5 inches long. Twist the two ends together. Flatten the bottom of the wire so it will sit in the bottom of the pot. Test it and make adjustments until it fits in the bottom and up the sides okay. Once it fits fine, use hot glue to glue it into the bottom. This makes the handle of the pot. Next, use a cap to scoop out a capful of beans. Pour them into a paper cup. Squirt some white glue (Elmer’s is best) into the cup. Using a wood stick, stir the beans until they are completely covered with glue and sticky. Should not be “soupy”, that means there is too much glue. Using the stick scoop the beans into the pot. Use the stick to move the beans around, make sure they are pushed down tight into the cap and slightly leveled off at the top. Take a flat wood toothpick and cut it in half. Put the wider half into the pot in the beans next to the side of the pot. Pour some more glue around the “spoon” to be sure it gets glued into place. The pot will need to dry overnight. Make sure you use WHITE glue. Do not use the blue glue that Elmer’s makes. The blue glue will make the beans mold. |
 |
|
 |
|
 |
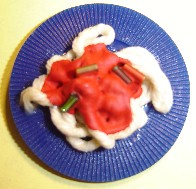 |
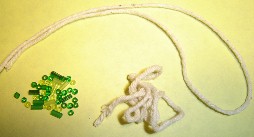
Spaghetti: Supplies: Cut a piece of string 12 inches long. Put in a paper cup. Pour a small amount of glue on the string. Use a wooden stick to stir the string around until it is completely covered with glue (should not be soupy). Put the pile of string on a poker chip and move it around until it looks like a pile of spaghetti. Ideally, the string should be completely dried before painting. Pour a few drops of red paint on the middle of the spaghetti to make it look like sauce. While the paint is wet, sprinkle a few green beads on the paint to look like spices. If you want to make it look like there are meatballs, put a few brown, size 6 or 8 beads on top. |
 |
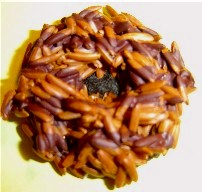 |
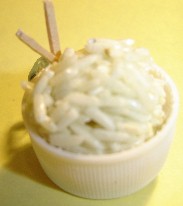
Samoa Cookie: Supplies: Pour some rice into a paper cup (about 2 scoops of a water bottle cap). Pour a few drops of Milk Chocolate paint on to the rice. Also put in some white glue Using a wood stick stir it until the rice is brown. If necessary, add some more brown paint. Pour the rice mixture onto a piece of wax paper. With the stick, move it around to make a round cookie shape and then make a hole in the middle. Using the Dark Chocolate paint, paint some “fudge” stripes on the cookie. Ideally, the “cookie” should be dried before putting the bottom on. Using hot glue or white glue, glue the cookie to a piece of felt. Trim the felt to the cookie shape. This makes the “fudge” bottom of the cookie. If you are making this without waiting for the drying, then cut a circle of felt 1 ½" in diameter. After shaping the cookie on the wax paper, spread glue on the felt top, then gently slide the cookie onto the felt circle. Do this BEFORE painting the stripes. Warning, making this Swap tends to be very messy to make because you sometimes end up using fingers instead of the stick to make the cookies.
|
![]()
 |
 |
Webmaster: Debdemer@aol.com
Send mail to debdemer@aol.com with questions or comments about this web site.
Copyright © 2002 All rights reserved.
Last modified: 04/08/2009